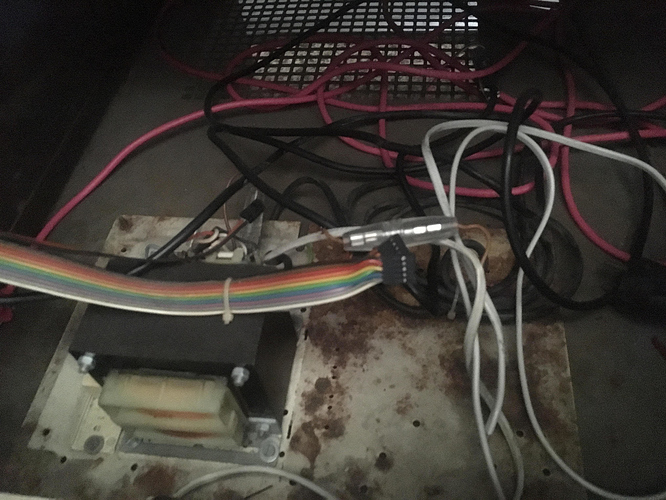
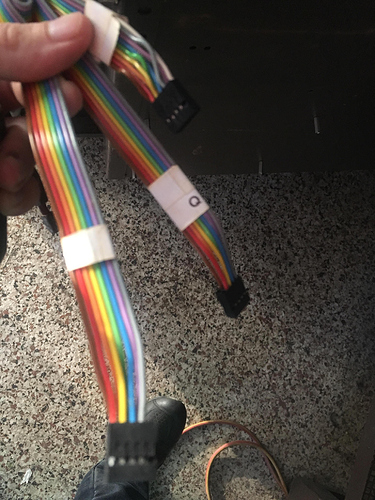
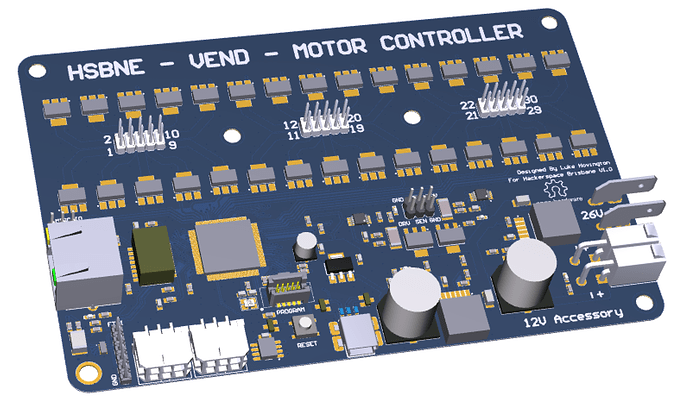
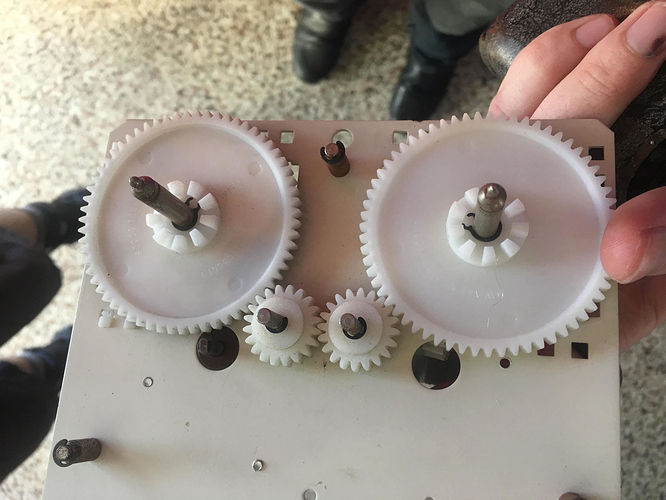
Here is some pics that I took of the vending machine’s progress…
Some of the buttons need to be debugged but the majority of the hardware is in a “Working” sate waiting for some code!
FYI, I should be working on code for this tomorrow night.
So I have a new board for this vending machine, though I don’t think I will have time to put it together on Tuesday night.
Would anyone like to help place all the bits and reflow the board? (assuming the parts arrive in time)
I’m hoping the solder paste is still in the fridge as this will be the easiest way to put all the bits on the board, I feel soldering some of the components isn’t a option due to the heat sinking capability of the board.
Anyway if anyone has a free night and wants a help out in this project then that would be awesome!
PS a steady hand would be preferred as it is dealing with small components.

I’m not dead yet
So this project has stalled a few time since the last post, but is moving along.
The ribbon cable has been reterminated to slot in nicely with the new electronics that is presently waiting software.
The Main board has been built (though there was a routing mistake so a wire mod is now required)
Some test software to run this needs to be written to test each channel.
I would like some help with remodelling and printing/making some of the gears in the
We have a few on file presently (see trello https://trello.com/c/ktQxXXfK/234-create-3d-models-of-gears-for-electronics-vending-machine) but any help in this area would be greatly appreciated.
Lets get this working before the end of the year!
I’ve suggested to Hovo that we could even laser cut the layers of the gears out of delrin for longevity, as I suspect if we print the gears we might end up replacing them more periodically.
@DreadPirateRobinson has expressed an interest in milling the gears out on his CNC also.
I’m unsure how many / what stage of modeling the cogs got to.
I don’t have much interest in doing much in the way of the gears, mostly due to time constraints.
So if someone wants to take this on that would be ace!
I can give some guidance if needed.
I other news the PCB is getting another look in presently, might be going through a respin due to a few mistakes I have made.
How about just copying existing gears in silicone molds?
@lhovo
Just checked, Somebody did a quick extrusion in Solidworks but nothing serious. Was that me???
Anyway, if you tell me where to find the gears and which ones you need I wip up the models.
@andrew1973
I think it is less likely to loose a model than a physical mold and easier/more accessible for the majority of people to just print a new one instead having to work with resin.
@svenska - yes 3D printing the gear is a lot easier than casting. I was thinking casting because of strength reasons though.
Last Tuesday I was deep inside the machine ensuring the parts that I have chosen would drive the motors.
This was a spaghetti of wires, but it proved that my concept was sound and the motor’s run nicely with the new driver.
As my enthusiasm for patching another mistake that I made (the programming header) faded into the distance, I thought a board spin was in order.
Along with patching the main driver board, I have also made the some modifications on the input board that senses the keys.
The Input board will also supply power to the rpi and with a bit of luck the rpi board will communicate back to the input board to receive button data and authorisation to spin the motor.
Just as I was writing this post it occurred to me that it would be cool to have a light barrier somewhere in the drop zone to ensure the item has vended, as these type of vending machines have a habit of short changing people.
Presently I have enough smarts to tell if the motor span and turn off all power when it finishes it’s loop but having a final check that it dropped would also be good.
I haven’t done much research on this yet as I will be going to bed now, though if you have any suggestions on the design and or what light barrier would be suitable I can add it to the design that would be totally rad.
Thanks all for your help so far!
Necro-posting here but I’m taking this project on to get it active and operating again.
The plan is to use this machine to stock consumables so we can track how many are being used. This means we would have standard space consumables like safety goggles, side cutters etc for $0 in the machine as well as cause specific consumables that will likely be at cost. This will give us a better handle on how we’re going with keeping these sorts of things in stock.
As of right now I’m debugging how the motors are driven and developing some boards to interface with the motors and the front panels which will all be based around mcp23017 i2c expanders on a common bus.
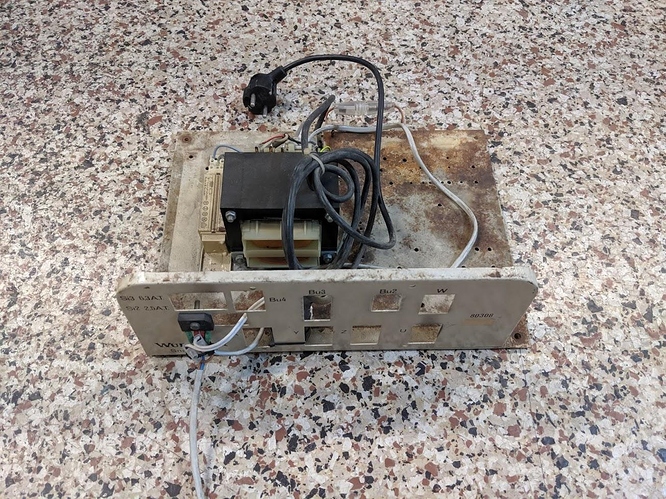
On Tuesday night I will be installing a new power supply, having removed this terrifying beastie on the past Tuesday.:
I’ll be tracking progress on our Trello publically at https://trello.com/c/zintRe38, if there’s a task you think you can chip in with please hit me up and we’ll see what we can do.
Sorry I have become time poor to finish this project to completion.
I have a board I created to drive the motors.
Schematic here -> https://github.com/HSBNE/VendingMachine_MotorDriver/raw/master/PCB/Main%20v1.2/Project%20Outputs%20for%20HSBNE-MAIN/HSBNE-MAIN.PDF
I’m more than happy to drop it over on a Tuesday night as my time at present is not enabling me to finish what I hoped to complete.
Things that I did do:
- Rewire and crimp new plugs onto motor wires
- Fix missing/broken cogs
- Made a controller board
- Made a test program to prove hardware works.
If you need any help guidance with how it’s wired I’m happy for forum / email discussions.
@lhovo you’ve done a significant of work to the machine to make this project much more achievable, life just gets in the way some time.
If you get a chance to drop it by we can try to go from there, I’ll shoot you an email so I can get my head around how the motor logic works 
So, quick update.
@lhovo dropped in with his output board and I’ve used it as a reference because I haven’t been able to get the dev environment to work reliably. I’ve ended up designing an output board to work with an i2c input expander - the mcp23017. My plan is to use these on the input and output boards as one long i2c bus (the lcd on the spacebucks frontend hardware uses an mcp23017 also, so we’ll have 5/8 allowed on the bus)
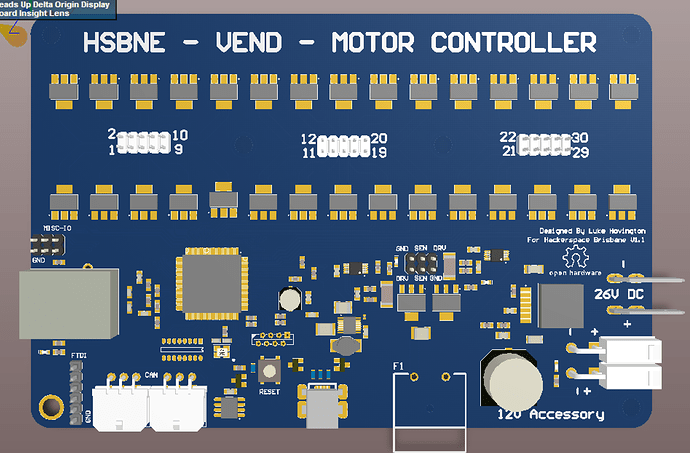
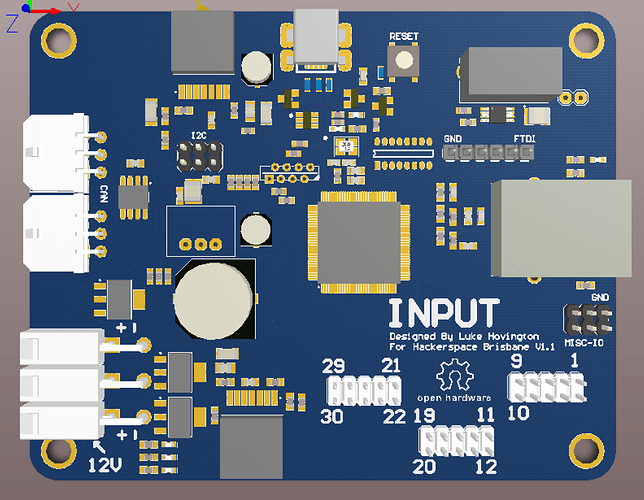
These boards look a little like this, with a few labels and refinements to go.
Input:

Output:
The power supply inside the machine has already been swapped out for a 10A 24v supply that has an IEC plug, so no need to deal with any mains wiring.
Quick update, but over the weekend I added a USB power supply and routed a screened USB cable from the new powerboard in its base all the way up to where the Spacebucks control panel will go.
It’s now been outfitted with a temporary mounting plate for the display, with a new one to be lasercut soon.
Input and Output handling boards are on their way from china, they look a little like this:
Once these arrive, I’ll be working on getting all of the inputs and outputs working after populating the boards. After that, I’ll start looking into things like adding addressible lighting to the lines to indicate which item has been selected and display a countdown until the purchase is confirmed and the item is dispensed…
The boards have arrived, along with some other boards designed for implementing stock tracking in the drinks machines. Soon the parts for these boards will arrive and we’ll be able to begin implementation of the controls.
Also on the cards is new faceplates for where the labels used to go. I’m currently looking into some addressible side-lighting led strip so we can fit the labels and indicate which product you’ve selected and display a countdown for how long until it will dispense.


