I’ve evolved this a bit… one problem I had with the old set up (nothing to do with physical mounting) was that moisture would get into some of the connectors and give me grief … the worst culprit being the “Fast” button which toggles between fast tuning and normal tuning.
The same button when held down also powers the radio on and off.
It’s worth noting that the Yaesu FT-857D was never meant for use on any kind of open-frame vehicle, let alone a bicycle!
Plus the extension speaker, a mylar cone speaker I picked up from Altronics, I’ve been meaning to replace with something better for a while. I think the one they sold me has a twisted frame because without me manually twisting the frame back, it sounds utterly terrible due to misalignment of the voice coil.
So… a fresh start. I ordered some bits from Mouser, namely:
Out of the junk box I managed to rummage:
- 2 DIN-6 connectors, one was liberated from an earlier attempt at a break-out box
- 1 female DB25 connector, liberated from some old project
- 1 RJ-11 connector
- 4 100nF ceramic capacitors
- 1 330µF electrolytic capacitor
- 2 1k resistors
- a small amount of veroboard
and from the HSBNE bone yard:
- 1 DIN-5 connector (found about 3 or 4 of these)
- 1 RJ-45 connector (there’s a BIG tube of these)
On my bike I have three runs of CAT5e cable terminated with DB25 connectors. The idea being that if I replace the radio, I just replace the wiring harness at each end. The radio itself uses an RJ-11 for the head unit and an RJ-45 for the microphone. The DB25s have proven pretty reliable in the weather, despite being the non-weatherproof type. Prior to this, I used a homebrew clone of the Yaesu extension kit (homebrew because the official one has cables long enough to wire a council bus!) and was forever replacing those modular connectors.
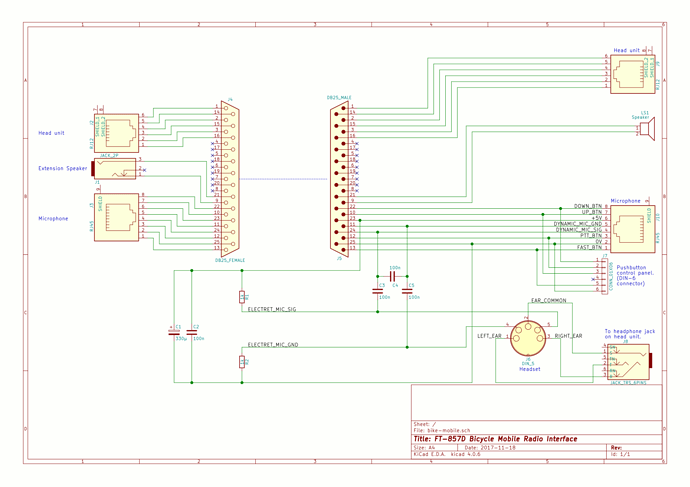
The schematic is pretty basic. It is a refinement of what I had when I first started getting serious with the bicycle mobile rig. KICAD lacks a DIN-6 connector in its standard library, but if you look at one of the connectors on the front panel, the centre pin is 0V and going clockwise from the bottom left the pin connections are: Down button, Left Button, PTT Button, Right Button, Up Button. (i.e. in alphabetical order)
Although the Yaesu FT-857D makes no use of the left direction button, it’s there for future use for a radio that might use it. Or I can wire it up to the tuner or the CW key… haven’t done that as yet.
I pick 14 pins on the DB25 connector for the microphone and head unit connections. Two RJ-11 pigtails are made up and each one is soldered to the DB25 so that a modular cable tester shows a straight-through connection. Since I had one end already, I just wired up the new end to match the old one.
For the microphone, same approach… I used two small pieces of Veroboard to interface to the offset pins on the RJ-45 connector, then ran a length of CAT5e to the DB25 connector. With a RJ-45 cable tester running, I soldered each pin again ensuring a straight-through connection.
I then wired up my headset adaptor in parallel to this RJ-45 connector. That way, I can plug in a standard Yaesu hand-mic (although I seem to have killed mine with the bouncing around in the top box.)
The two capacitors on the power rail (C1 & C2) and the one across the dynamic microphone input (C4) should hopefully shunt away the RF that is notorious for getting into my transmitted signal and should let me get back into doing HF on the bicycle.
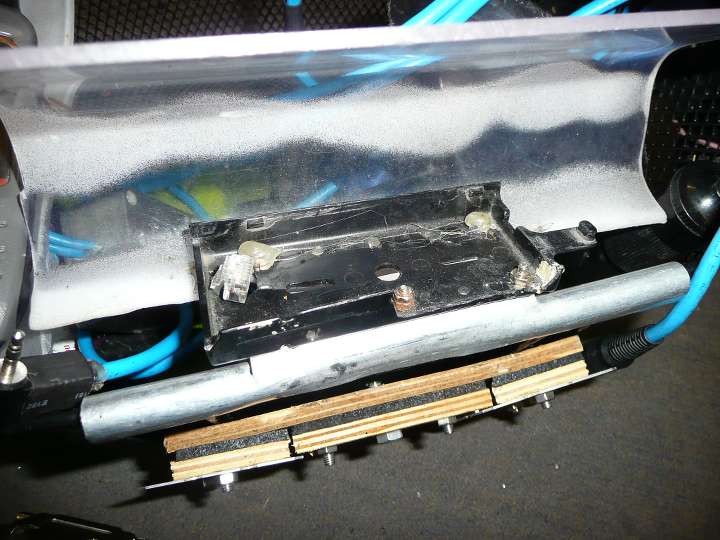
The mount I printed out earlier at the space has been bolted to the top of the plastic box with 6 4mm nylon bolts. I used some 10mm×3mm hex spacers with 3mm screws to secure the plastic box to the bicycle basket down the bottom, and up top, bolted a section of aluminium U-channel to some aluminium rectangular section. 3mm screws inside the case bolt the case to the aluminium. The U-channel anchors the top to the edge of the basket, and the rectangular section gives me something to bolt the old rain shield to.
I had a lot of fun and games with getting my connector pins backwards, ended up de-soldering and re-soldering connections about 5 times before realising where the mistake was. As a result, the nice colour scheme I had going is messed up, but it works now so I won’t change it!
Future plans would be to see if I can tap the earpiece connection from the 6-wire link between the body and head unit. I know one of the wires is in fact the fast tuning / power button on the head unit, and on my previous wiring harness I had that wire disconnected due to the moisture issues. I’m guessing the signals are (in no order):
- Power rail, probably 5V.
- Power button / Fast tuning button (active low with pull-up)
- Headphone signal
- Body→Head unit control signal… probably UART
- Head→Body unit control signal… probably UART
- 0V reference.
So a future job might be, if I continue to get issues in wet weather, would be to put a TTL buffer between the radio and the head unit / control buttons.


