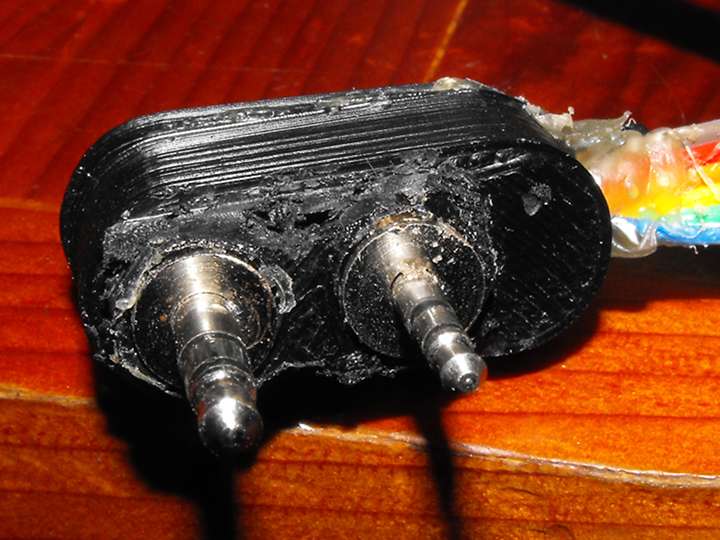
I have a Kenwood TH-D72A radio, and a couple of Wouxun KG-UVD1Ps that all take a “two-pin Kenwood” headset connection.
Previously, I used plugs snipped off old headsets (specifically an old Heil headset; overpriced junk) and speaker-mics, and this works okay, but eventually the cable fails, as they’re typically cheap grade cable. At Mt. Binga last year, the headset set-up was working well until the plug developed a fault causing the PTT to stick, resulting in a dead carrier. Thus, I needed to replace it, I could either play Russian roulette with another purchase, or I could hack one myself.
Last time I tried doing this, it was with a bit of protoboard, and some jacks from Jaycar, trying to cut the protoboard to get the right spacing was a pain, and it was hardly weatherproof! This time around, I had a choice. I could have the housing manufactured here for a more rugged design.
That’s where I got the model from, and one thing to note is it’s for an older iCom radio. Not knowing better, I chose the files icomplug-a.stl and endcap.stl. These were printed on the Taz with one of the high-quality “structural” settings. I chose “structural” as I knew this would get pulled in and out. This resulted in a part that also had some in-fill, but never mind, just used the rotary tool to cut that out, and drilled out the holes for the 2.5mm and 3.5mm plugs.
I found the rainbow-coloured ribbon works for this; just cut off a length, split it to give yourself 6 lines, roll up one end and stuff it through the cable feed hole at the end. How durable this cable is, I’ll find out. 
The 3.5mm and 2.5mm plugs will need some trimming, specifically the contact that doubles as the cable retention; you’ll need to trim it back to the same length as the other contacts. At this point you’ll want to familiarise yourself with the pin-out. G4WPW has us covered…
http://www.qsl.net/g4wpw/date.html
If you scroll down, there’s a link to the Kenwood SMC-32:
Then, pick a wiring colour scheme, and start soldering. I ended up assigning the following colours:
- Brown: 0V
- Red: VCC (2~3V)
- Orange: Speaker
- Yellow: PTT
- Green: Microphone
- Blue: Remote
Based on that, the wiring inside the plug goes:
- 2.5mm sleeve: brown
- 2.5mm ring: blue
- 2.5mm tip: orange
- 3.5mm sleeve: yellow
- 3.5mm ring: green
- 3.5mm tip: red
Solder these up, make sure the contacts don’t touch, then I found hot glue worked for sealing the connectors in the housing. The end cap I think is supposed to fit within the cavity, but I was unable to make it go in, so I flipped it around. The other end of that cable, you’ll want to break out to suitable connectors. I went with my usual; a DIN-5 for speaker/microphone and a DIN-6 for PTT; you might opt for more conventional 3.5mm jacks, that’s up to you.
Yes, that headset was a Logitech USB headset in a past life. The USB bit stopped working.
One thing I found is that the model I chose wasn’t a good fit for the TH-D72A. It’d work, but then the slightest bump would cause one of the connectors to not make good contact, and the radio would go into transmit.
Looking at that Thingiverse page, icomplug-41w-a.stl looks like it might be a better fit. In my case, I just trimmed it back with the rotary tool. This fixed the problem, and now the connector fits snug with no connection issues.
It’s not pretty, but it seems to be working just fine testing at 50mW on a simplex frequency. The next WICEN event will be the litmus test for this I guess.


