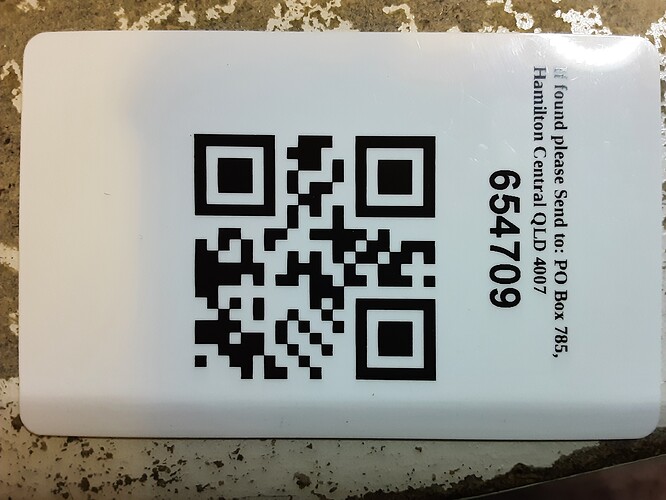
The access cards are a valuable part of making our space safe and yet accessible 24/7.
Some great minds understand that adding extra stuff onto the cards makes for a better and easier time.
So, ignorant of the above, I have undertaken to merge the very retro rfid access card with this centuary’s smart devices using QR codes, blood, sweat and a few quite moments. And. A selection of choice terms, expressions and ideas.
The following is the current ‘state of play’.
Its not a real swipe card. Just a test print card.
Lets start with a picture that makes more sense than me.
Creating the HSBNE space card system has, and continues, to be a memorable and compelling experience. Getting familiar with the printer has brought back childhood memorys of Dad, his dental practice and hobby cow farm. In particular the wonders of birth. As this going from inside to outside means complications can arise, see next picture.
Also.
A rarely known fact for many HS members to appreciate is the transition from rubber band driven techology, like realy old dentist drills - like Dad had. To newer smoke powered technology enjoyed by many members and integral to this project. Like smart devices and modern tech stuff thingies.
 .
.See picture above. Image that beauty slowing grinding through your enamel and tooth insides to fix a cavity or root canal.
Fortunately the Zebra p330i card printer is not fussy about its insides. While a real belt is on its way, tkz Pres Josh, a #64 rubber band is keeping the project on track. See two pics above for the before and after shots of my first internal precedure on the beastis. Hint more internals are expected.
Next installment will not be so visually confronting and much more techo with words like QRCode, python, tkinter.
Fair warning. Pyserial will be mentioned along with serial ports and loooowww speed communications, checksums and other really old stuff.
A quick post to show the two ends of the access / space card printing process.
The RFID reader loop on the left and a stack of printed cards are in the output hopper of the printer on the right.
The very basic RFID loop layout, green pcb and copper wire loop, is attached to a section of strip board and uses a USB to TTL, with the ‘power on’ led lit, module to both power and communicate with the PC. (Via the blue USB cable). This comms link runs at 9600 bits per second. Or the speed QUT was connected to the internet when I joined as a data comms/ network tech last century.
Some spare wires are attached to the green PCB in case I want to create an ESP8266/32 experience.
This low speed setup uses the PYSerial library to establish comms with the rfid module.
An LED provides an indication the RFID module has read a card. This LED runs off the RFID card. Of note is that the RFID card and Win 10 will buffer a card code which the python code can access well after the event. This is good and bad.
The printer hopper holds 80-90 cards when this full. Some times cards need a second run through the printer. This second run proves just how good the alignment is through the printing path.
Just behind the printer , hidden by a tangle of cables, is a standard test print card. The test print card is a result of a power on startup procedure. Currently this is one of the few things the printer will produce.
The other things the printer produces is USB error msgs. And. print error msgs.
Hopefully an electronics nerd will revive the printer’s USB comms.


